
Conker season arrives all at once. One morning the pavement under the big tree at the end of the lane is swept clean; a week later it is a carpet of split husks and glossy brown nuts, and somebody has already claimed the best one. Get the timing right, then be patient for a few weeks afterwards, and you will have a box of good conkers to see you through winter. Rush any part of it and you will find a tray of shrivelled, furred, grey-green nuts sometime in November, wondering where it went wrong.
What follows is the order that works: read the tree, pick carefully, sort the same day, dry slowly, store in something that breathes.
Read the Tree, Not the Calendar
Horse chestnuts usually start dropping in late September and carry on through October, with northern and upland trees running a week or two ahead of sheltered southern ones. Wind and rain do most of the work, so the best collecting comes after a dry, breezy spell rather than a downpour.
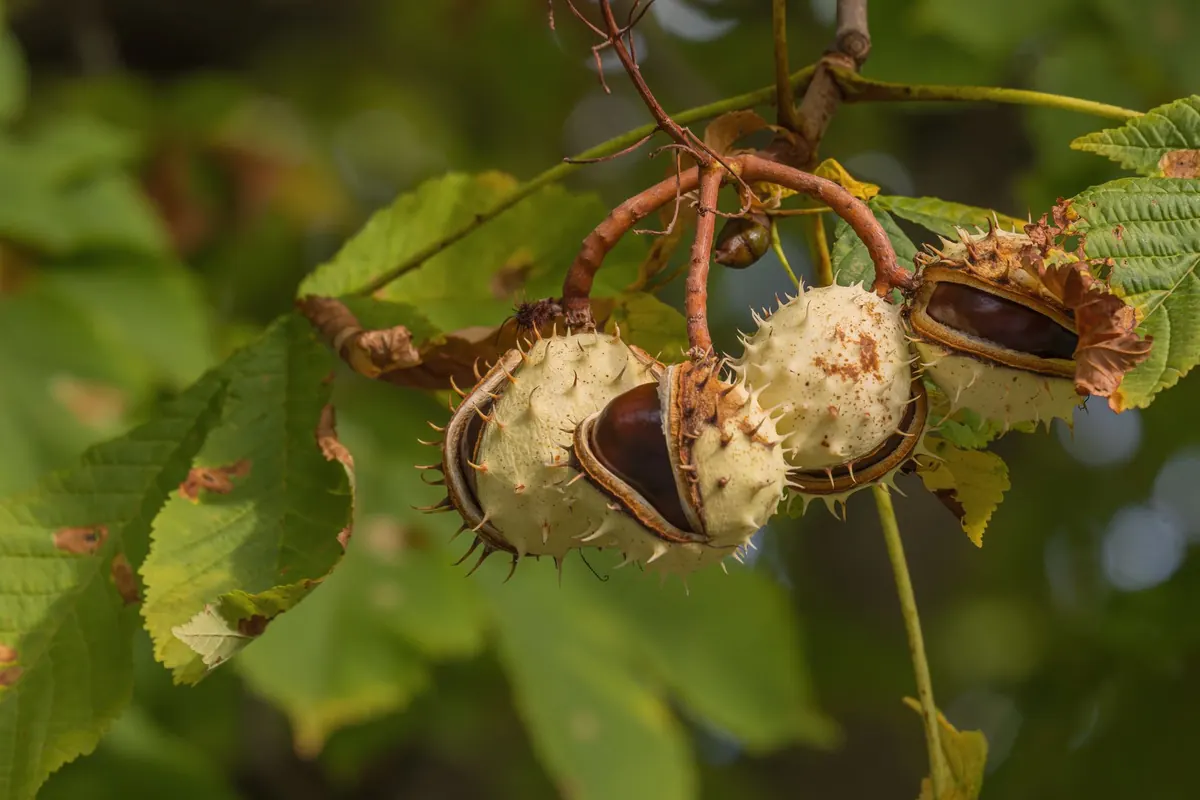
The signs that the season has properly started: husks turning from green to yellow-brown and splitting into three segments, and nuts on the ground with a fresh, pale tan scar where they were attached. That scar is the best indicator of freshness. If the conkers you are finding are still tightly packed in green husks, the tree is not ready. Leave them. Shaking branches or knocking them down with a stick gets you unripe nuts that shrivel to almost nothing within a fortnight, and it does the tree no favours either.
Foraging: What to Pick, What to Leave
Once they are falling on their own, work along the ground rather than reaching into the branches. A few minutes of picking through what is already down is worth more than an hour of trying to hurry the tree along.
- Firm all over. Press the whole surface with your thumb. A good conker gives slightly and springs back; a soft patch means rot has started inside.
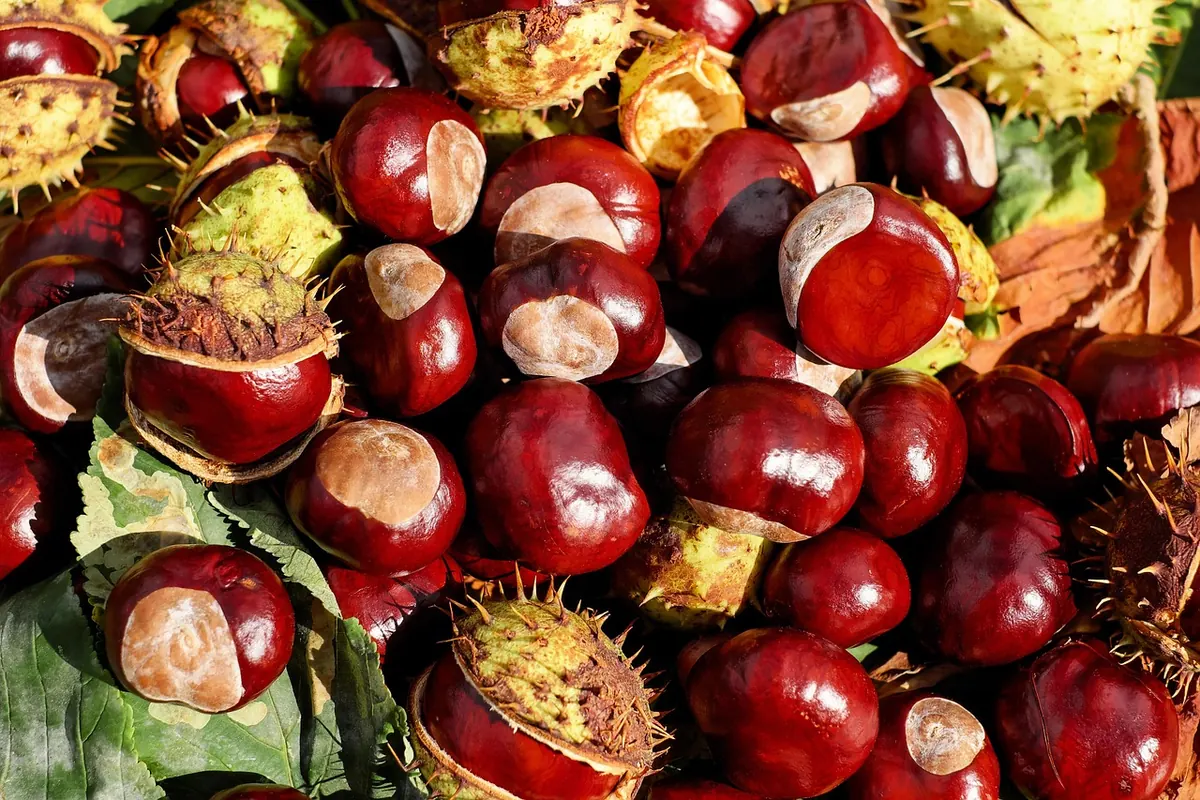
- Even colour. Deep mahogany with a gloss. Pale, mottled or washed-out patches usually mean the nut came off early.
- No pinprick holes and no fine dust. Small round holes mean something has been living in there. Tap the conker against your palm and look for powder.
- Heavy for its size. A light conker is a dry conker, and it will not improve.
- Out of the husk. If it is still cradled in green, put it back on the ground and walk on.
Flat-sided conkers play and store just as well as perfectly round ones, so do not leave them behind. Take only what you will actually use; a couple of handfuls is a season's worth for most people. On managed estates, nature reserves and some parks there are rules about collecting, so keep an eye out for signage and ask if you are unsure. And if you are gathering with children, gloves are worth having. Fresh husks are spiky and the ground under a chestnut tree is rarely spotless.
Sort and Clean the Same Day
Whatever you bring home, deal with it before bed. Husks left in a bag hold moisture against the nuts and start the whole rot process while you are making dinner. Peel them off outdoors if you can, and keep the debris out of the house.
Do not wash conkers unless they are genuinely muddy. If you do rinse them, dry each one with a cloth and then leave them in the air for an hour before they go into a tray. A bucket is the worst possible container: the ones at the bottom sweat, and by the third day they will be growing fuzz.
Go through the pile once more and pull out anything with a hole, a soft spot or a smell. Those go straight outside or into the bin, well away from the rest.
Dry Slowly, Out of the Sun
Lay the conkers out in a single layer, not touching, on newspaper or cardboard. A cardboard egg tray is ideal, one conker per cup. The right spot is cool, dry, dark and airy: a garage shelf, a shed, a spare room floor, the bottom of a wardrobe with the door ajar.
What you are aiming for is a slow loss of moisture over three to four weeks. A radiator, an airing cupboard, a sunny windowsill or a warm oven will drive the water out too fast and the conkers will crack along the pale scar or wrinkle into little brown brains. Turn them every few days so no side sits damp against the paper. Expect the gloss to dull and the weight to drop a little. That is normal. A powdery grey or white film that wipes away and comes back is not.
Storing the Harvest
Once they have dried, the rule is simple: the container must breathe. Air moving around the conkers is what keeps mould away.
- Cardboard boxes with a few holes punched in the sides
- Paper bags, folded over rather than sealed
- Egg trays on an open shelf
- Cotton or mesh produce bags, hung up
Avoid sealed plastic tubs, zip bags and lidded glass jars. Moisture comes off stored conkers even after drying, and in a sealed container it condenses on the inside and drips straight back onto them.
Keep the store cool, dark and steady. A dry shed or garage is usually fine. Somewhere that swings between frost and warmth is not. Check the box every few weeks and remove anything soft, dull or furry immediately, because one bad conker will take its neighbours with it. If you are the sort of person who labels things, note the date and which tree they came from. Next year you will know exactly which one to visit first.
A word on hardening treatments: coats of oil or varnish, vinegar soaks and low-oven baking are all argued over, and none of them fix a poorly dried conker. Oil and varnish applied too early simply trap moisture inside. If you want to try a folk method, test it on a small batch and only after the conkers have dried properly.
Spotting Trouble Early
Most storage failures announce themselves quietly. White or grey fuzz, a musty smell, or a conker that feels lighter than it did last week all mean the same thing: too much moisture in the container or the room. Move the survivors somewhere drier with better airflow and discard anything touching the affected nut. Soft, spongy patches mean internal rot, and there is no saving those. Fine dust and new pinprick holes mean something has hatched out, so clear the whole box and start again with the sound ones.
The Season Checklist
- Wait for husks to split and conkers to fall on their own.
- Collect after a dry, windy day, from the ground, firm nuts only.
- Dehusk and sort the same day; bin anything soft, holed or smelly.
- Dry in a single layer for three to four weeks, cool and out of direct sun.
- Turn every few days and watch for cracks or fuzz.
- Store in cardboard, paper or mesh, never sealed plastic.
- Check monthly and cull the failures before they spread.
Do that and the harvest will still be sound in February, ready for drilling, stringing, or simply filling a bowl by the door until next autumn.
Photo: Ilo Frey / Pexels